|
|
|
|
|
2000 SType Vertical Control Arm ReplacementThe car was being taken in for inspection when we
noticed a strange steering issue.
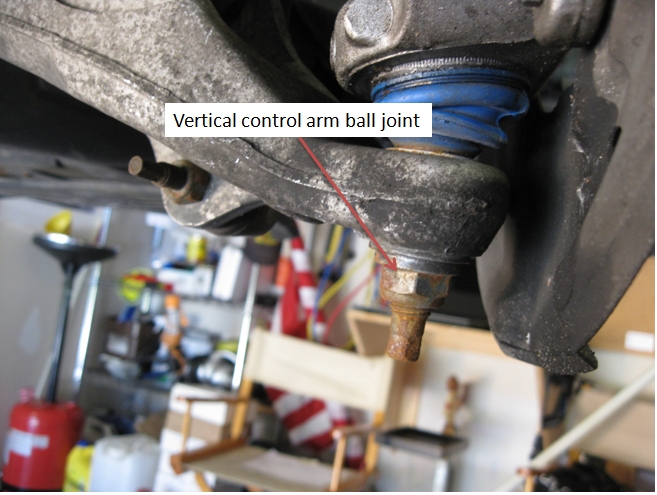
So on the lift it went and what we found was a loose nut on the
right lower ball joint.
What a surprise! Talked to
a friend and he told me of a TSB
S204-R136. I tightened the nut and re-greased the ball joint and got
the car inspected. Because
of this situation I put the car back on the lift to inspect the ball
joint and found the nut loose again.
Time to replace the ball joint.
Went searching and found Mevotech vertical control arm with ball
joint. I looked at the
reviews and they looked good so I ordered it and installed it.
About 9 months later I was having a steering issue with a little
noise. I was away from home
so I took it to a local garage.
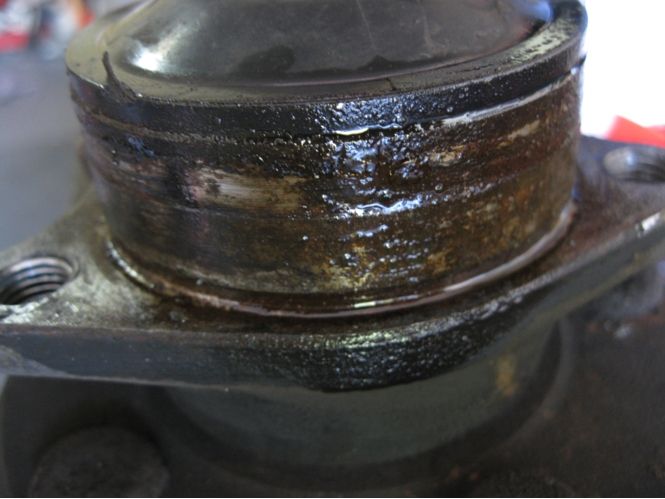
What we found was a ball joint that was bone dry and loose in the
ball joint. We packed it
with grease and it got me home. When I got home I was on the phone with
the manufacturer and they told me that they had a lifetime warranty.
Great! I felt that
was a good thing until they told me I had to go through the distributer.
Well that did not work. It seems Amazon, who I got the control
arm from, is not the distributer, another company was.
The icing on the cake was that Amazon return policy was 30 days.
After my being persistent Amazon agreed to replace the control
arm. Not what I wanted.
I checked further and found a
few other complaints about the Mevotech
ball joints having issues with
the lack of grease in the joints.
So if you have one, check it and repack it. I did not take the
proper photos for this procedure but I pieced it together in a sequence
that should help.
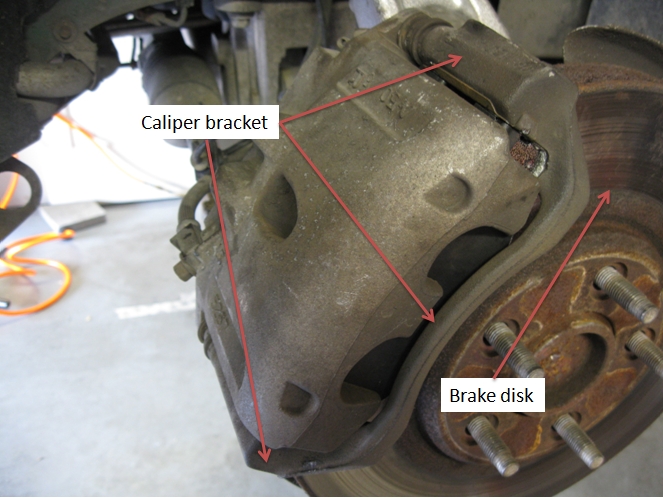
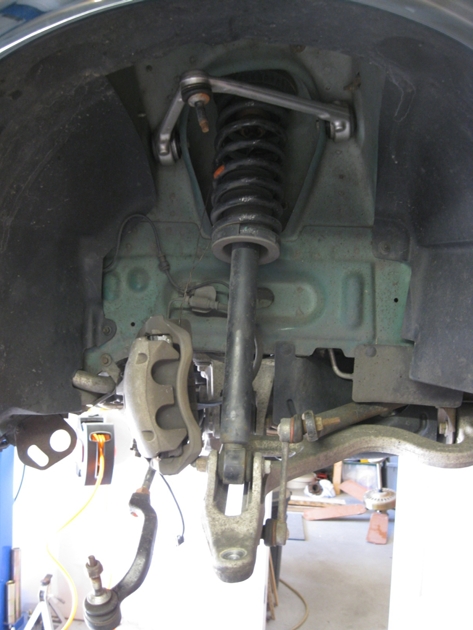
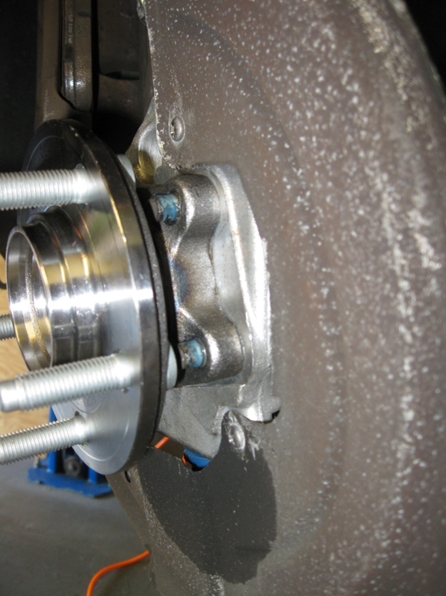
The first step is to remove the wheel. The next is to remove the caliper bracket so you can get the brake disk off.
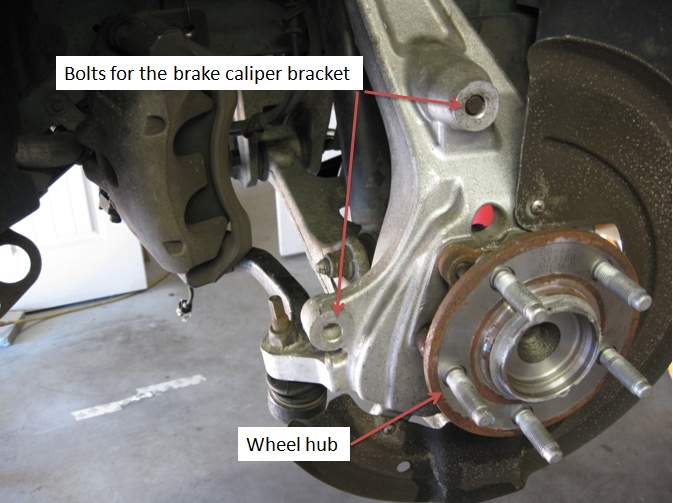
The bolts for the caliper bracket are in a different place than the ones for the caliper. Remove the 2 bolts and lift the entire caliper and bracket off as one unit. Be sure to hang the caliper without twisting the brake line. Once that is done you can pull the brake disk off the wheel hub.
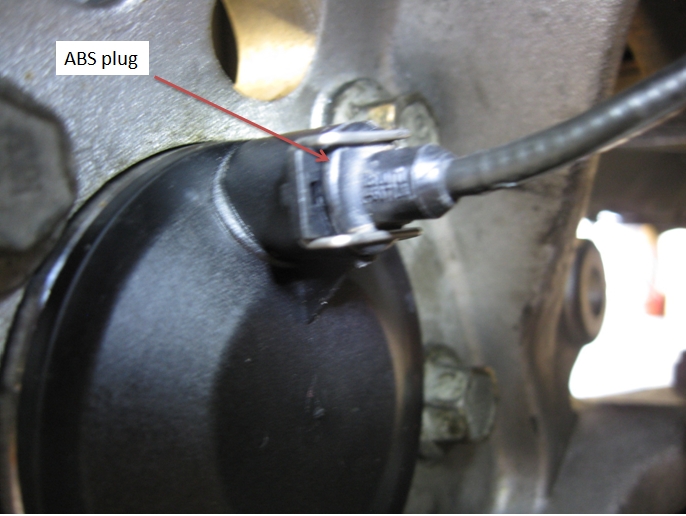
Behind the hub you have the ABS sensor that needs to come off. To do this just push in on the clips on both the top and bottom and the sensor will come out.
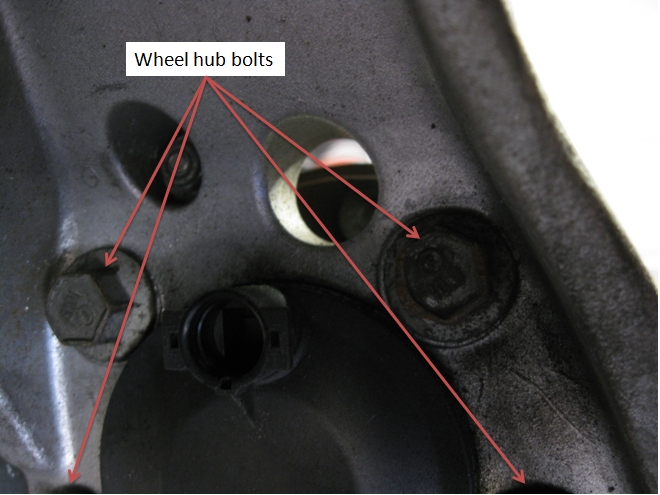
Once the ABS sensor is removed you will need to remove the wheel hub 4 bolts. You may need a breaker bar for this because they were installed with Loctite. So be prepared.
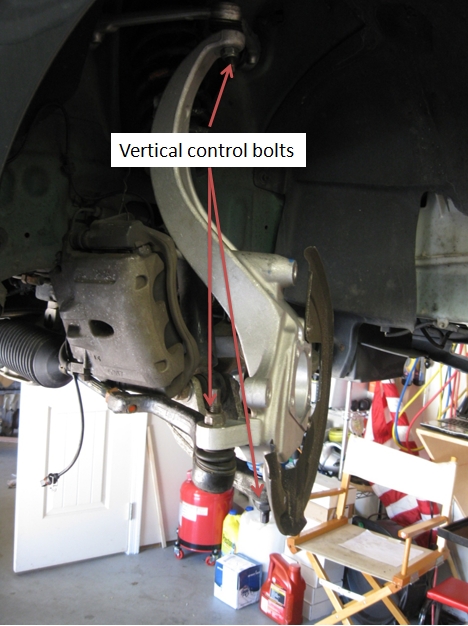
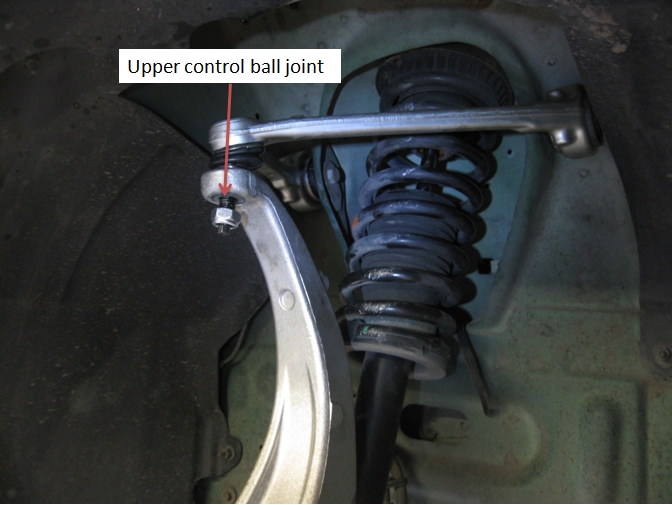
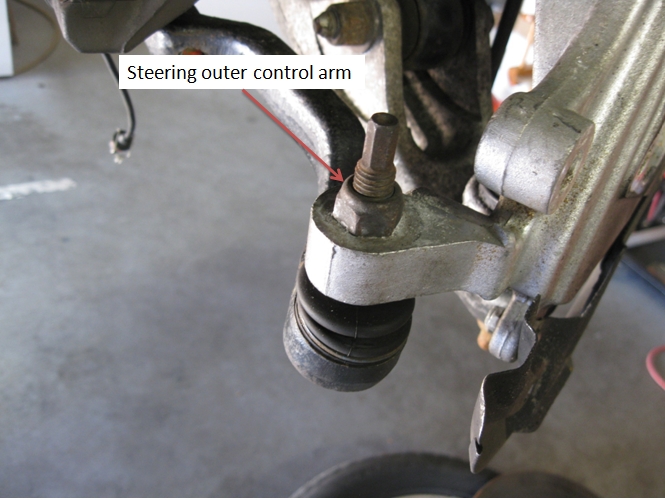
Remove the nuts on the upper control arm, lower ball joint and the outer control arm.
Once they are removed you can lift the control arm out.
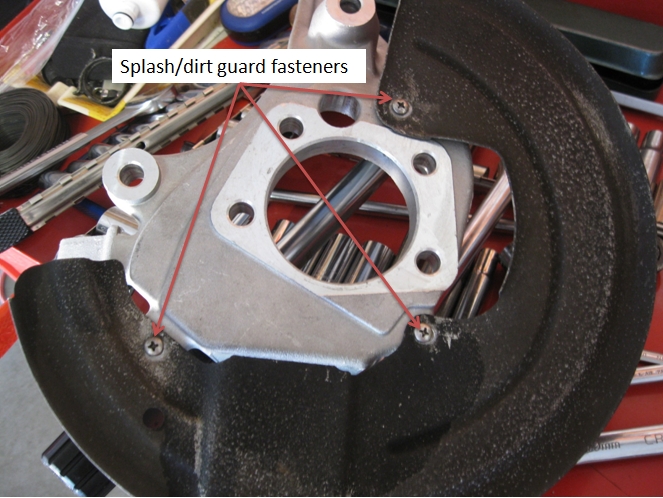
The splash guard was installed on the original control arm with pop rivets. To remove the rivets I just used a chisel with a hammer. I did not have the right size rivets so I got 3 screws with lock nuts to reinstall.
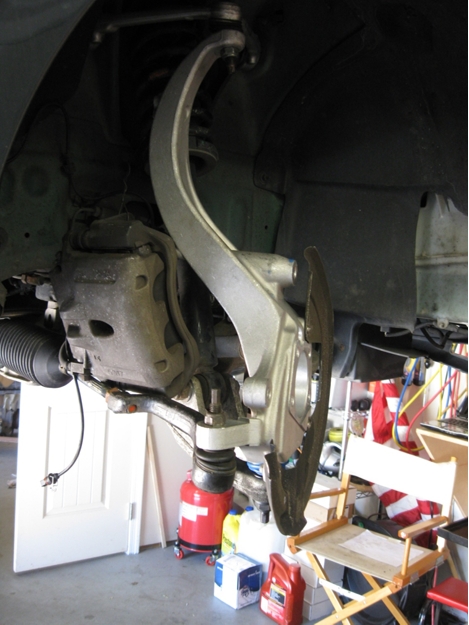
Installed the new control arm.
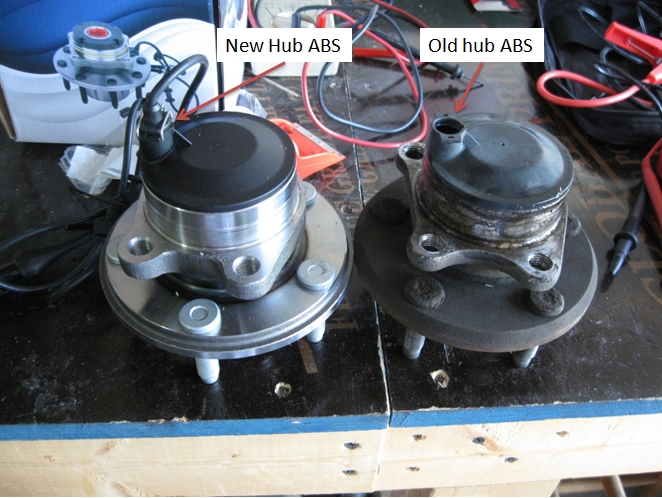
This is the new and old wheel hub. Notice that the ABS sensors are different. This meant I needed to replace the lead. I should mention the new hub came with a new ABS lead. A good thing!
The old hub. I think the fact that the ball joint was dry and steering was labored that it helped in reducing the life of the hub. Good thing I planned on replacing them both.
I cleaned the hub bolts and used blue Loctite when I installed them. Put it all together and I was back on the road to the alignment shop. Be sure that you use the proper torque specifications for your car if you elect to do this repair.
|
|
|