|
|
|
|
|
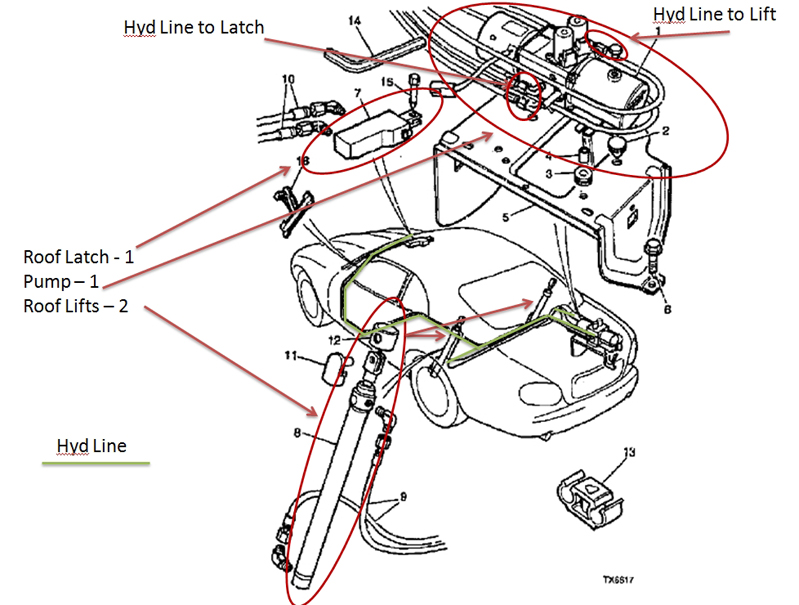
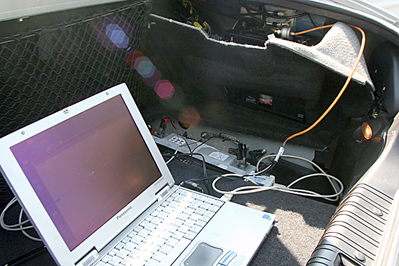
Jaguar MY XK8 & XKR HydraulicThis information on the hydraulic hose, latch and lifts and will cover XK8 XKR MY 1997 to 2006. Several years ago I had a hydraulic hose fail that operates my roof on my 1999 xk8. At that time I could find little to no information related to the hose, latch or how to replace the equipment. At that time I began a crusade to make a procedure to replace the hydraulic equipment and to find the cause and make a solution to the problem. I posted information then and I am now I am updating that information. I hope it helps! Overview of the Hydraulic system on the XK8 XKR
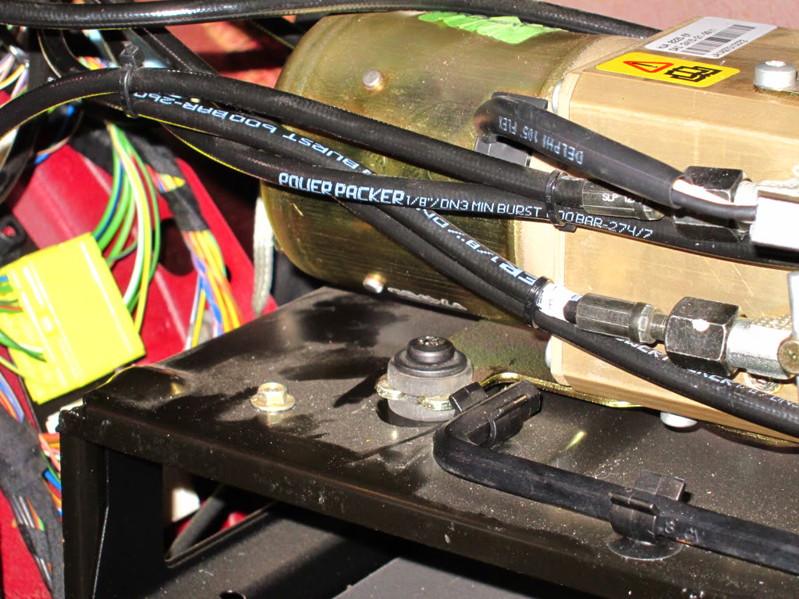
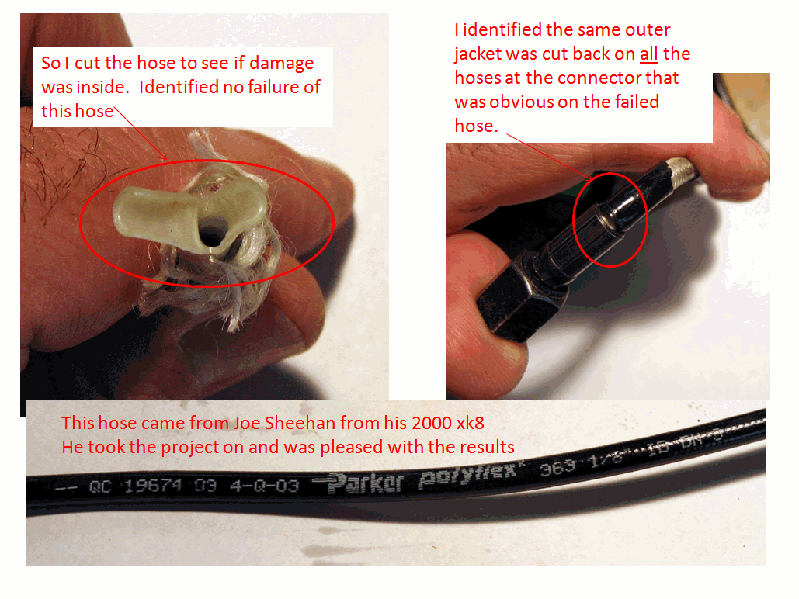
This Link is For the Electrical diagram Hydraulic & Electrical Roof Operating Diagram The hydraulic system on the XK8 & XKR are by Power Packers and the early years of the car 1997 to ? the hoses installed in the system were rated at 600BAR that is equal to 8702PSI. The other figures on the hose are the Julian date of the date it was manufactured. The pump puts out 1600PSI! Now I am not sure when that hose production was halted but what we are seeing are hoses with 303 & 363 stamped on them and they are the ones failing.
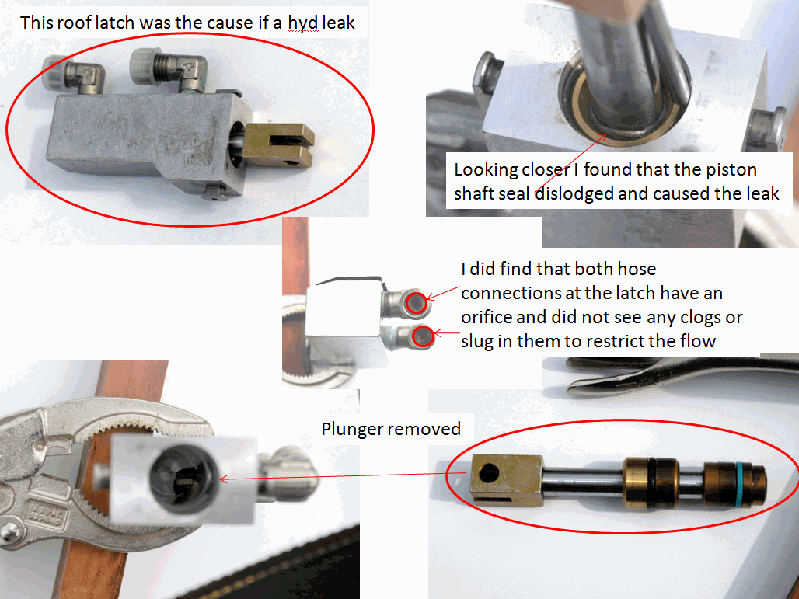
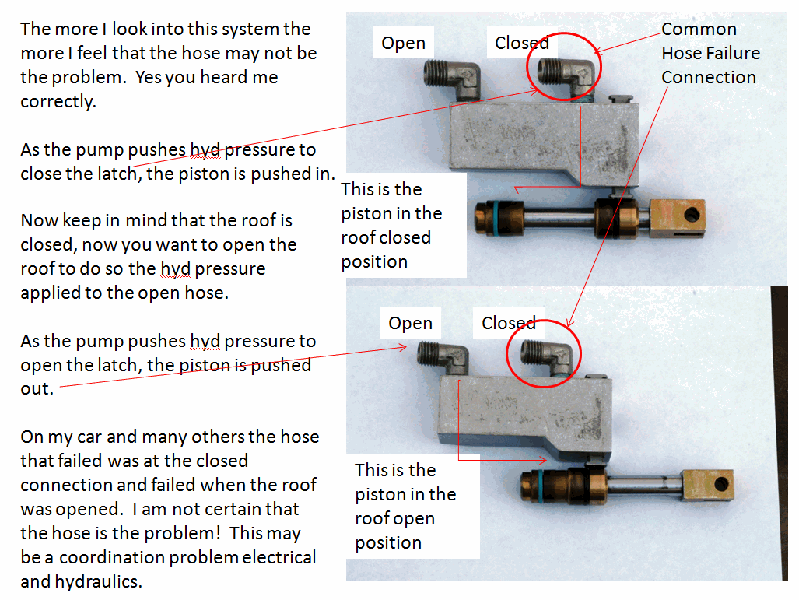
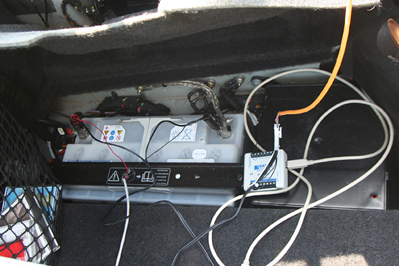
Hose and Seal Failures When I first began my investigating the hose failures I was told that the old fluid gelling and jamming the latch was the problem. I was also told that holding the roof operating button longer than necessary was also part of the problem. I was never so miss informed in my entire life. It appears that the old fluid had a tendency to gel but without getting my hands on a sample I am unable to confirm, what I can tell you is that Jaguar put out a TSB 501-33 to replace the fluid every 2 years based on that assumption. I can honestly tell you I have yet to see the Pentosin CHF 11S gel it is a synthetic hydraulic fluid. I should mention that it is green in color I understand the old fluid had a brown color.What I have confirmed is that the pump puts out 110 +/- 20 BAR and that is equal to 1600 PSI and the hoses and seals are undersized for this type of pressure and the examples below will give you an idea on what is taking place. Photos below are the hose failures at the latch and the latching mechanism.
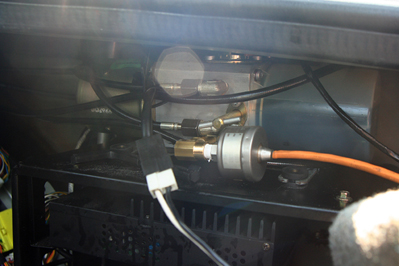
This was my first evaluation of a hose failure and I was waiting for another to see if my findings are consistent and they were. Let me first begin by saying that the hose itself did not rupture. It appeared that the hose worked itself out of the connector. I took both ends of the hose, one from the latch at the header and the other from the pump in the trunk. Both sections measured the same but the one at the latch / header was a bit more ridged or so it felt. The section that pulled out of the connector measured smaller leading me to believe that it stretched and with the pressure it worked itself out. I feel that this is due to the higher temperatures in that location. What I did notice is that on all connectors the outer jacket was trimmed back and it was not in the area that was crimped. I thought this was a little odd. Perhaps the size connector was designed to accept the outer jacket and it was trimmed away. I also noticed that this is the same connector that failed on my car. My evaluation of this hose leads me to believe that the connection at the connector failed. The question is what went wrong? Let me say this! I have been in the electrical business for over 30 years and I have found that if the improper connector size or crimping tool is used a failure will occur at that location.
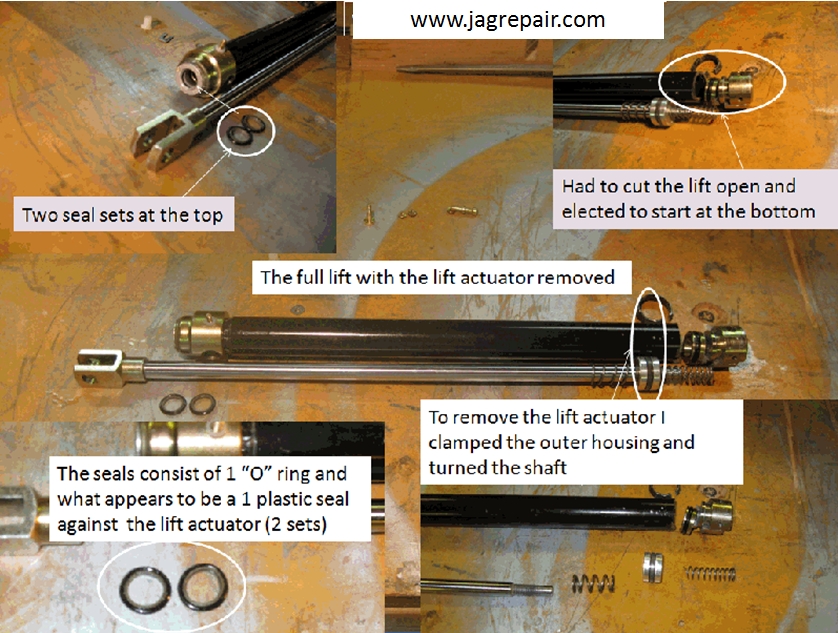
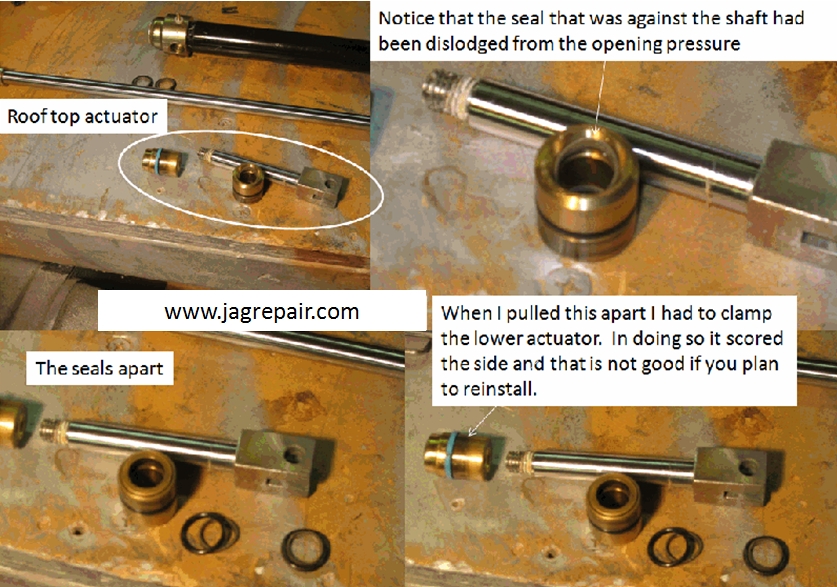
I have dissected the pump assembly but still don't have a good
answer. It is an unusual design so it will take some more work
to trace things out. The passages are buried in the pump body and I
will use compressed air to trace them out.
They are using a pump that
operates off non-concentric rings, sort of like a wankel
engine. Pressure is created when the rings come together and suction
when they are apart. The value is that it generates high pressure
with low volumetric flow in a one stage pump. This is not possible
with a 12V motor using more convention types of pump.
Generally it is very sophisticated and the workmanship is
excellent and the pump should last a long time.
If you look at the Power
Packer literature they talk about coming out with "high pressure
systems" in 1990. The value of high pressure is that the
mechanical pieces can be smaller. High pressure compensates
for smaller piston area in the cylinders. The negative side of
this is that the cylinders and fittings have to hold up under high
pressure and that is exactly our problem. This also might mean
that pressure relief won't work as they need every bit of psi to
make the undersized parts do the job. That part is still under
surveillance.
Now that I know the fitting
specs I should be able to put a gauge on my car and measure what is
happening. I have an assortment of transducers in the 3000
-7500 psi range so I think I'm good to go once I do some more
studying of the pump body. It has a central pressure port
coming from the pump and I haven't been able to find if that is
directly ported to the outside. It appears not at this point.
If that is the case I can measure the pressure in one of the
individual circuits to see how high it gets. The highest
pressure will be when closing. According to the tech bulletin
the switch in the right lift cylinder and the roof closed switch are
in series. This means that the pump is on until those two
switches are made. I think this is probably the worst case and
where I hear the funny noise from the pump on my car. If a
relief valve is the solution then one of those two circuits will do
the job for both since they are connected together at that moment.
It looks like the design
is all about getting as much pressure as possible and trying to
design components that will withstand it. This is why no
relief valve. Based on time frame from 1990 ours is probably
one of the early versions since car designs roll over in 5-10 year
increments. More when I have it. Walt. Update from Walt
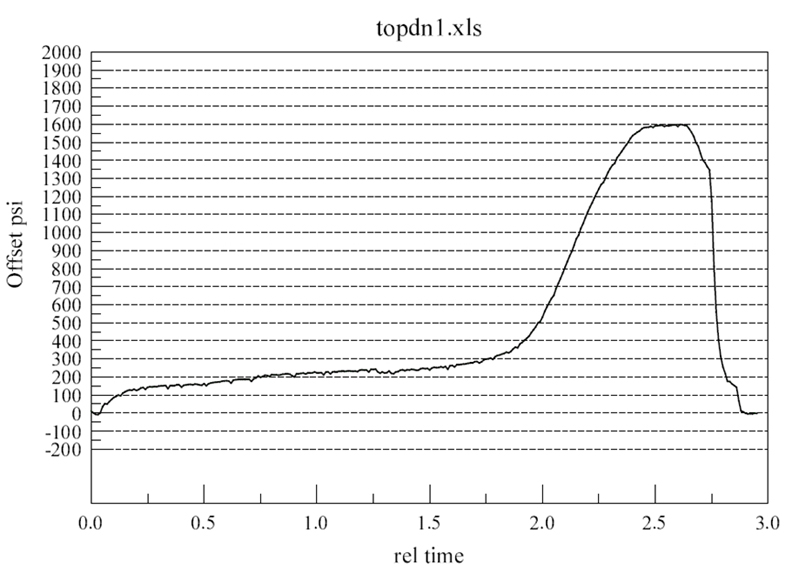
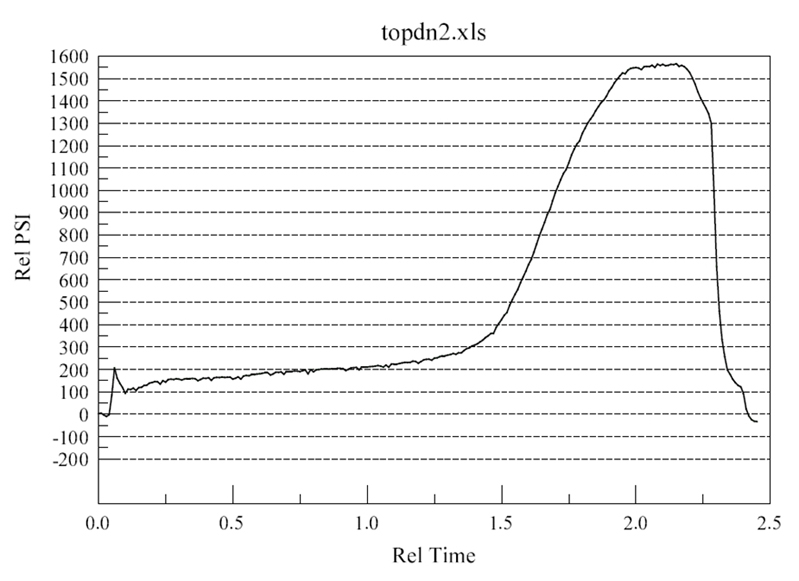
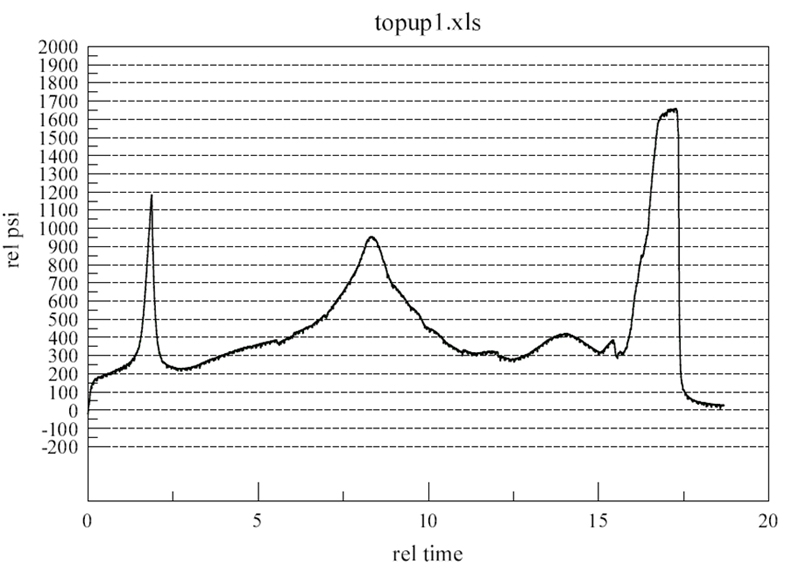
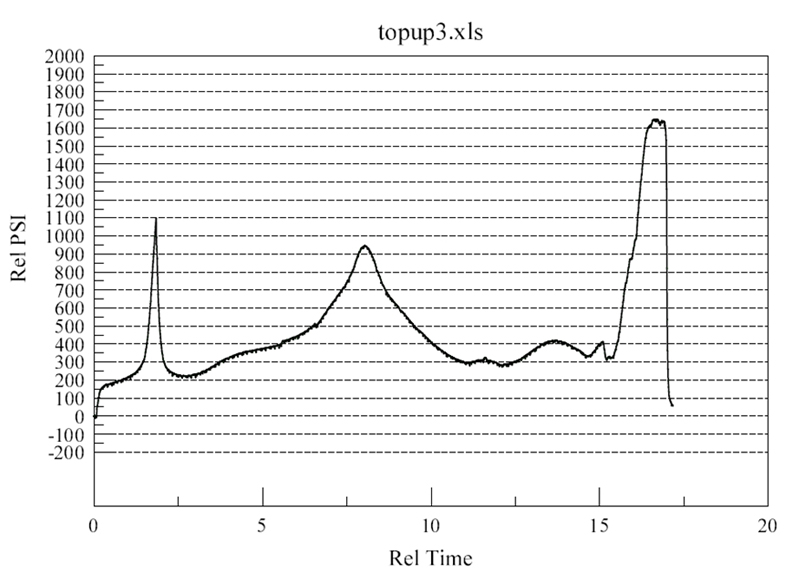
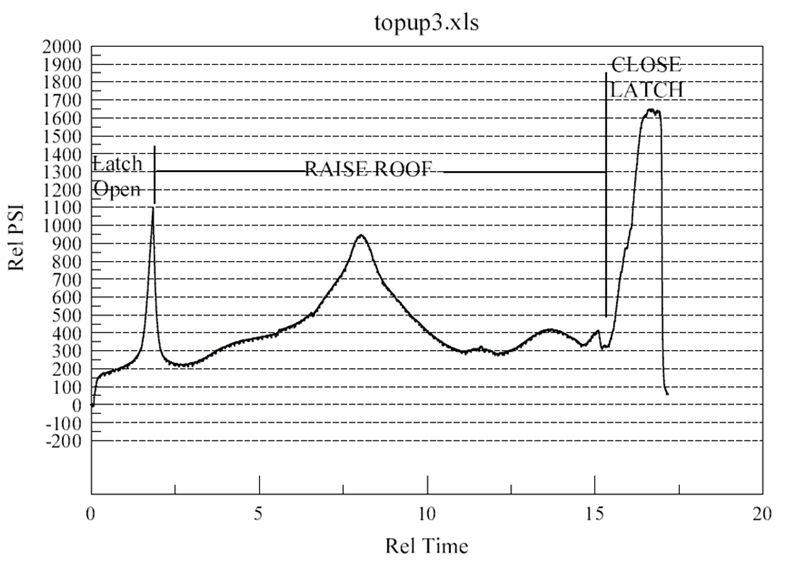
I
think the long runs are going up and the short ones are
going down. Pressure was recorded 100 times a second and
the X axis is time in seconds. The lift time seems too
long so a little confused by that but I know it takes longer
than going down. Maybe it does take 17 seconds to
close the top. Going down only takes about 3 seconds
if I am interpreting things correctly. I had the
logger running as I ran the top up and down and then
exported to Excel, where I cleaned up the data and deleted
the dead spots. Then I exported that to my plotting
program so I could get better presentation. If it is
helpful to your web site efforts I can export the plots in
other formats.
As I expected the max
pressure occurs when the top is being latched in the closed
position. The data shows about 1650 PSI at that moment
because the top up cylinder is still running with no motion
and the latch is closed while that is going on. This
matches well with what Power Packer told you.
I think the narrow
spikes are the latch operating and the wide spikes are the
lift cylinders. In the final bit the lift cylinders
are pressing the top against the latch with no motion and
the latch is pulling it into place. The no motion part
is what causes the high pressure as the oil has no where to
go.
I'm not sure why there
is no pronounced latch spike going down except that the top
must be helping things so maybe the pressure is much lower.
I think the top is sort of spring loaded so when the latch
releases it pops open. This is probably why they keep
the lift pressure on during the latch operation.
I also see no evidence of
"trapped pressure" as I had postulated. At the
completion of the move pressures drop immediately back to
near zero.
A short hose was developed and made available by Jaguar. However, this short hose repair kit was a huge failure and was discontinued (no longer available). If you get one and install it plan to do it again soon. I installed the repair kit and in my opinion it was doomed from the onset. This link is to the connector that was used and the instructions to install This was an adventure in gathering this information related to the roof operation. Getting answers from Jaguar and PowerPackers was non existent and I think it was because they had no idea themselves and weeding threw the non truth was a real challenge. Walt and I spent a great deal of time to give you the right information. I hope this helps you to better understand the system and the cause. |
|
|


